

How To Swap Parts Of A Face In Photoshop
In this tutorial, we will demonstrate the face up swap technique to seamlessly clone the face from one person onto another person using PaintShop Pro's cloning tools. Y'all'll also learn how to use the Smart Clone tool introduced in PaintShop Pro 2020 for faster and easier cloning and blending.
Thanks for watching! We hope you constitute this tutorial helpful and we would love to hear your feedback in the Comments section at the bottom of the page. Yous volition find a written version of this tutorial beneath, and a printable PDF copy to download on the Download Resources tab in a higher place.
See what's new in PaintShop Pro 2022!
Download your FREE xxx-day trial and become all the colour and brightness yous've been missing with PaintShop Pro 2022, your all-in-i photograph editing and design software.
Download these free resources:
Written tutorial (PDF, 647 KB)
PaintShop Pro Resource
Keyboard Shortcuts (PDF, one MB)
PaintShop Pro User Guide (PDF, 17.4 MB)
What'due south New in PaintShop Pro
Cloning and Blending
Face Swap in PaintShop Pro
In this tutorial, we will demonstrate the face swap technique to seamlessly clone the confront from one person onto some other person using PaintShop Pro's cloning tools.
How to Face Swap using the Clone Brush
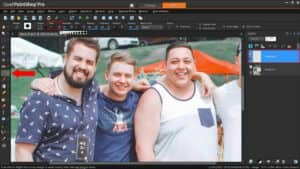
Open up PaintShop Pro with the image you want to work with in the Edit workspace. In this example, we'll clone one human'south face onto all the other faces in the photo to make a fun birthday card.
- Open the Layers palette past clicking on Palettes > Layers.
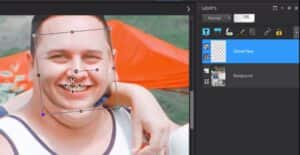
- Create a new layer by going to Layers > New Raster Layer and name this "Cloned Face".
- Click on the Clone Castor tool from the Tools toolbar on the left.
- Suit the brush size in the Tool Options toolbar along the top.
Make sure that the Background layer is selected in the Layers palette.
- Right-click on a part of the face you want to clone first to select the clone source.
- Go back to the Layers palette and select the "Cloned Face" layer.
- Brainstorm clicking your mouse to clone the face from the guy on the left onto the new man'south face.

Note: Don't worry nigh this looking foreign at start, because nosotros are cloning it onto a new layer so that nosotros can make adjustments later.
- After you've finished cloning, actuate the Selection tool on the left and select the "Cloned Face up" layer.
- From hither you lot can drag, resize and rotate the layer until it fits nicely onto the new head.
- Activate the Eraser tool on the Tools toolbar and clean up any edges along the cloned layer so that it blends nicely with the new face.

You might as well want to adjust the opacity level of the Eraser so that it blends even more than naturally.
How to Face Bandy using SmartClone
- Select PaintShop Pro'southward SmartClone tool from the Tools toolbar on the left.
- Select the Freehand selection type and drag your mouse effectually the face you want to clone and then release the mouse when done.
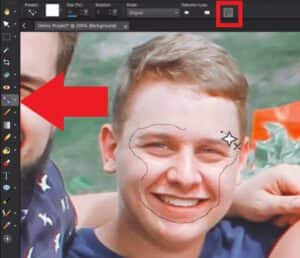
This will create a stamp which we can now use. Only in order to make adjustments to the postage stamp, we'll have to relieve information technology equally a preset first.
- Click on the Create SmartClone prototype from selection icon in the Tool Options toolbar, and then the Plus icon to create a new preset.
- Save this preset equally "Dave's Face" so click OK.

- Select the preset y'all just created.
- Utilize the Size and Rotation settings in the Tool Options toolbar to brand adjustments until the preset stamp fits perfectly over top of the new face.
Note: Brand sure yous have Original selected in the SmartClone mode dropdown so that the stamp blends well into its new paradigm area and then click your mouse to stamp it onto the new face.

- Apply the same preset onto the final face and again adapt the size and rotation of the stamp until it fits onto the new epitome area.
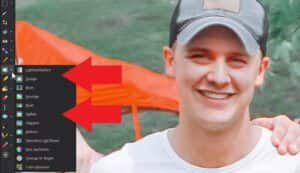
This last confront has some shadowing considering the man is wearing a brawl cap. You may want to make some quick edits to make the face up swap look more natural although the SmartClone tool has already done most of the piece of work for us with its automatic blending.
- Go to the Retouch castor tools on the Tools toolbar and utilize the Dodge brush or Lightness/Darkness brush on the areas that are a chip too dark.
- Equally a final touch, employ the Soften brush on the edges of all the new faces to create a smoother and more polished expect.
And but similar that, nosotros've swapped Dave's face up onto all of the guys in the photo to make a fun birthday card for our friend!

Source: https://learn.corel.com/tutorials/face-swap-in-paintshop-pro/
Posted by: rodriguezbusbar.blogspot.com
0 Response to "How To Swap Parts Of A Face In Photoshop"
Post a Comment